Getting Started with Vale
Working with Vale is the best automation tool for technical writers.
Why?
Vale is an open source style guide linter (more on vale in this article). It tells you exactly what’s wrong with your writing. If you already have a project that you want to use with Vale, this is a great article to follow for getting started. If you are starting from scratch and just want to test it out, please follow this video to go over how to start a project by cloning a boilerplate from GitHub.
Downloading and Installing Visual Studio Code
Vale works great with VSCode and makes writing your documentation much easier.
To download Visual Studio Code, simply navigate to the visual studio code website and follow the prompts to download for your operating system.
Installing the Vale Extension in VSCode
Now that you have VSCode installed on your computer, you’ll need to install and configure the Vale extension to use it with VSCode. You can do it one of three ways:
- On the top bar, click on “Code” then select “Extensions”
- On the VSCode sidebar, click on the image that shows three connected squares, with a
fourth square detached from the rest
- Click Ctrl + Shift + X on a Mac
You will then get a drop down menu with a search box to select or search for your desired extension. On the search box, type ‘vale’ then select Vale from the list and click install.
Once Vale is installed, close VSCode and then reopen it to restart it.
Configuring the Vale Extension
Before you can configure the Vale extension, make sure you are in the Vale root directory we previously cloned from Git. If you are using your own directory, then you need to make sure you are in your chosen directory. You can do this one of three ways: (for this example, we’ll refer to the vale boilerplate)
- Navigate to your finder or file explorer in your desktop and select the Vale boilerplate directory. After you select it, right-click and select ‘Open with Code’. This will open the directory in VSCode.
- On your terminal, shell, or command line, type ‘ls’ to see the list of folders in your computer. Once you identify the folder you need, type ‘cd foldername’ (you may need to repeat this step if the folder is a child folder within a parent folder). Once you are in the correct folder, type ‘code .’ to open VSCode in the directory.
- Open VSCode and click “file”. Navigate to the directory on your computer, find and select the vale boilerplate folder.
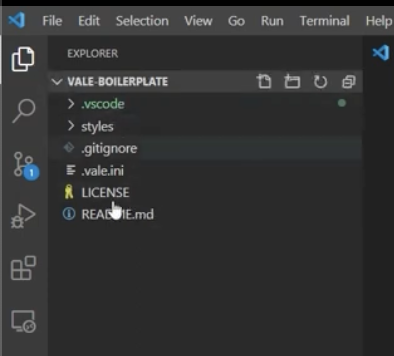
Regardless of which way you chose to open the project, once in VSCode, you should be able to see the Vale boilerplate folder as the main folder, and all the folders within it, located on the left panel.
Once you have followed the above steps to verify that you are in the right project directory, you can configure Vale to use the settings that we need it to use. To configure vale, navigate to file at the top left. Go down to Preferences, then Extensions.
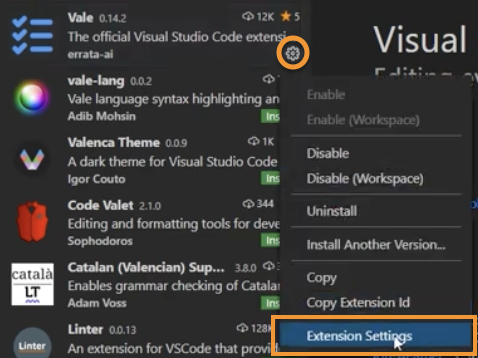
You’ll then see a menu with several extensions. In the search bar, type Vale. When you see Vale, to the bottom right of it, you will see a small gear icon. Hover over that gear icon, then go down and select Extension Settings.
This opens a settings menu for the extension, under the User tab. Here you will see an option called “Vale > Core: Use CLI”. Click the checkbox to select that option.
Further down you will see another option, called “Vale > Vale CLI: Config”. Here, you’ll need to enter the absolute path to your project. To get this information, do the following.
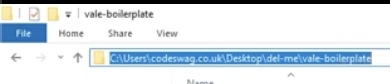
On Windows, go to your file explorer, in the folder where your project is located. At the top, you will see the path to your file. Copy that file path and paste it in the vale config bar.
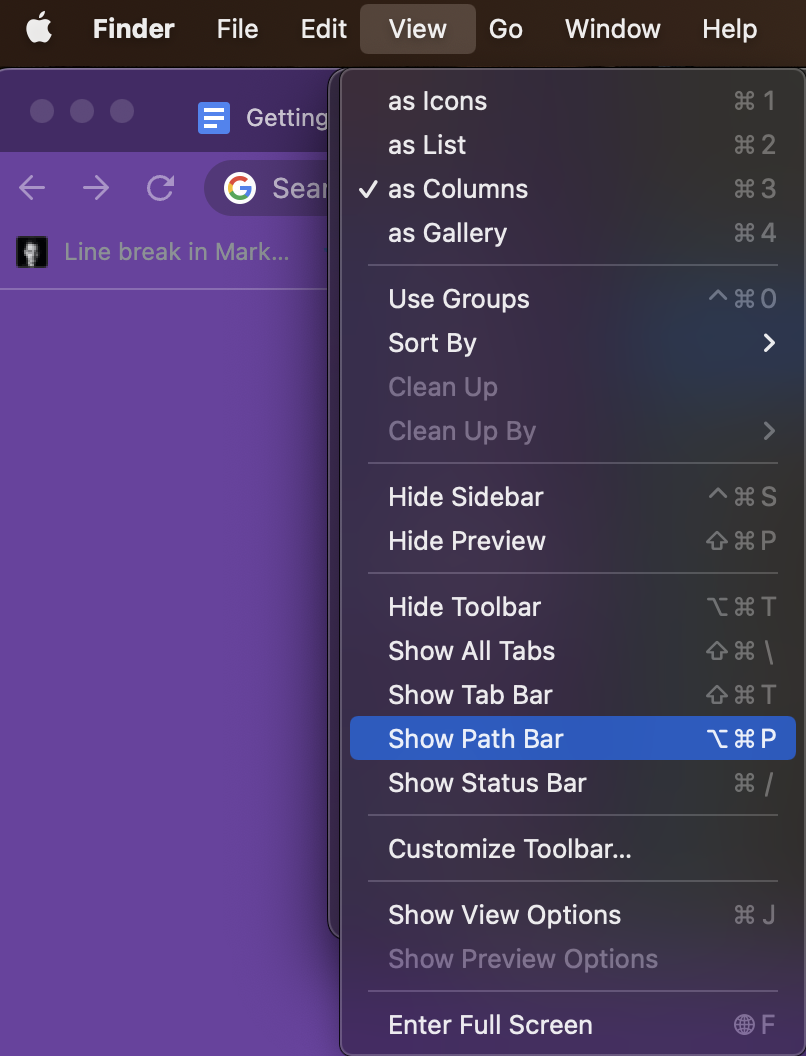
On a Mac, click the Finder icon in the Dock to open your finder window. Choose view > Show Path Bar. Copy the file path and paste it in the vale config bar.
Finally, further down, in Vale > Vale CLI: Path, type ‘vale’ in the empty bar.
Once you have configured all these settings in the User tab, switch over to the Workspace tab and follow the three steps above to do the exact same thing for each of the three options.
After you have completed these steps to configure the Vale extension settings, close VSCode to restart it, then follow the steps outlined in the Configuring the Vale Extension section to reopen your project in the correct directory.
Vale Linter on Sample Documentation
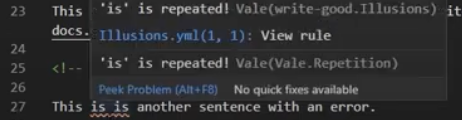
When VSCode re-opens, open the Readme.md file. If you’re working with the Vale boilerplate, you will notice some yellow and red squiggly lines. If you’re working with your own project, go ahead and start writing. Once you make a mistake that Vale recognizes, you will see those squiggly lines pop up. This is how you know Vale is working properly because those lines indicate corrections that Vale is pointing out. When you hover over those errors, Vale will show you a pop up message, telling you what the mistake is and a suggested correction.

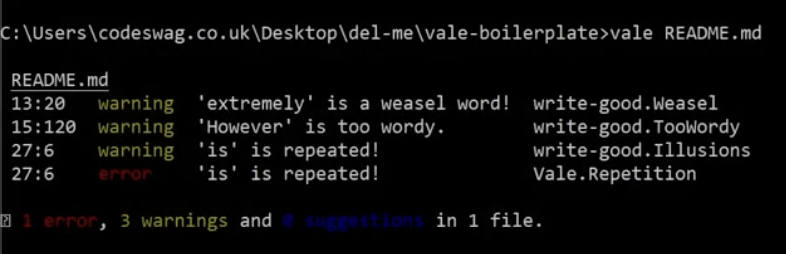
These Errors are also that are visible on your terminal command line.
This is how you can use Vale in VSCode. You can install and configure it so that when you write Markdown, it points out errors you may miss, and make correction suggestions for you.
Conclusion
Now that you know how to use Vale in VSCode, you can easily have it installed and running whenever you write your documentation. You only configure it once and it is active any time you open VSCode.. Vale is a great way to help you keep your documentation error free and as clear as possible.